CERN-ROOT and Code-Blocks
An acquaintance recently wished to utilize a full program in CERN’s ROOT6 with Code::Blocks IDE on Linux/WSL because they found the interface more familiar from prior coding exercises. I hadn’t used an IDE in quite a long time so I found the prospect interesting to explore. There were a few weird hoops to jump through but I managed to figure it out. Here are the steps, since googling didn’t lead to a ready-to-go solution.
- We had a custom Makefile that worked on bash, which uses
root-configto dynamically assign compiler flags and libraries - Fix 1: Go to
Project > Properties- Tick “This is a custom Makefile”.
- If we don’t do this Code::Blocks will make assumptions about how to compile files. At first glance, the process seems to go by turning compile source (*.c, *.cpp etc) files to .o and trying to link all the .o’s together to an executable with the project’s name.
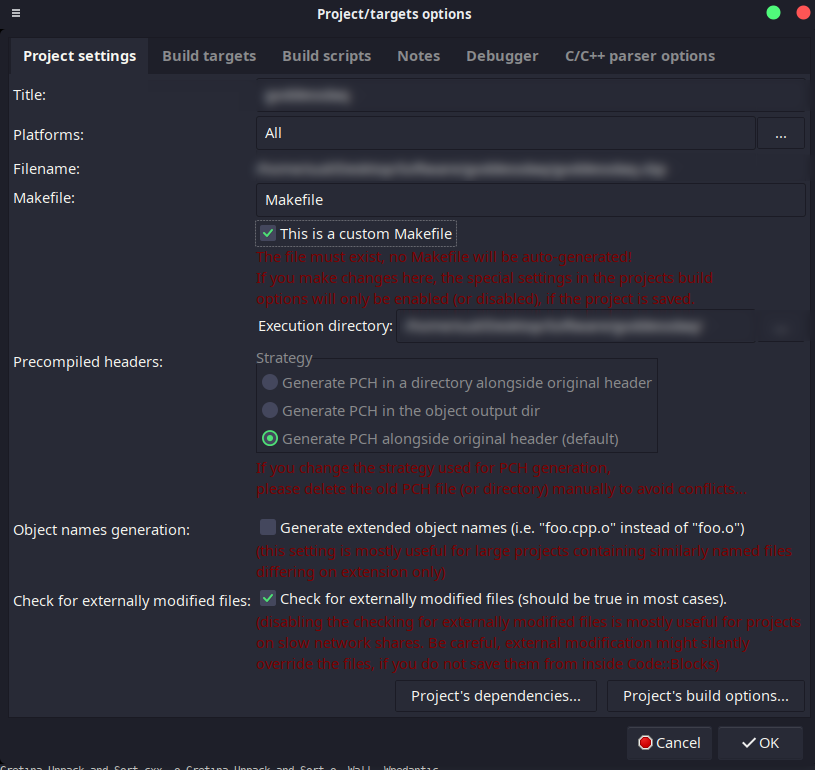
- Fix 2: If you now click ‘Build’, the default command that gets run would be
make -f Makefile Debugormake -f Makefile Release, because Code::Blocks expects this sort of structure.- Sometimes, like in our case, you want some control on this behavior instead of redesigning the makefile.
- To fix this, go to
Project > Properties > Project's Build Options > "Make" Commands, and remove all mentions of$targetin there. We only needmake -f Makefiletypically. Or, you could add whatever other ‘make’ switches/tricks you require here.
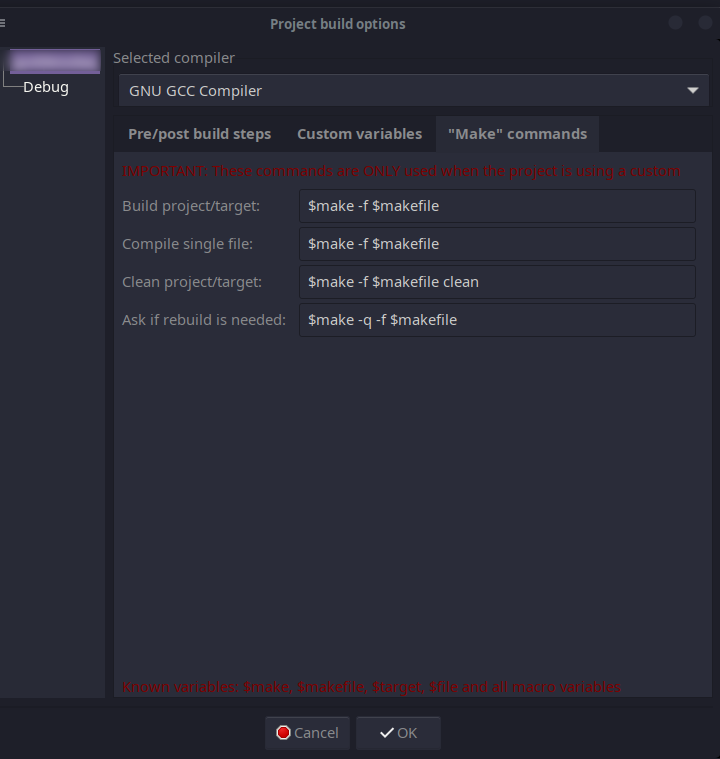
- Fix 3: Okay, let’s try compiling again after hitting “OK” as many times as needed so the settings above are saved.
- If your Makefile has all the
root-configmentions expanded out in full, things will run fine. But if you have our situation, and have the makefile literally useroot-config --cflagsetc as part of recipes, Code::Blocks will fail at the first mention of ‘root-config’ or ‘rootcint’ with something likebash: line 1: root-config: command not found. - This happens because Code::Blocks does not have all the right paths in its global $PATH variable to ‘see’ root-config and other things hidden in $ROOTSYS/bin, with $ROOTSYS typically defined in .bashrc by running
source /path/to/root/bin/thisroot.sh. What do we do? Skip the next step, I just had to put it in there so I remember it. - I tried a few things that didn’t work, like adding ‘source ~/.bashrc’ in
Project > Build Options > Pre/Post Build Steps, or doing a $PATH export there likeexport PATH=$PATH:/<path>/<to>/<root>/bin/. They didn’t do much as of CB version 20.03. - What did help, was navigating to
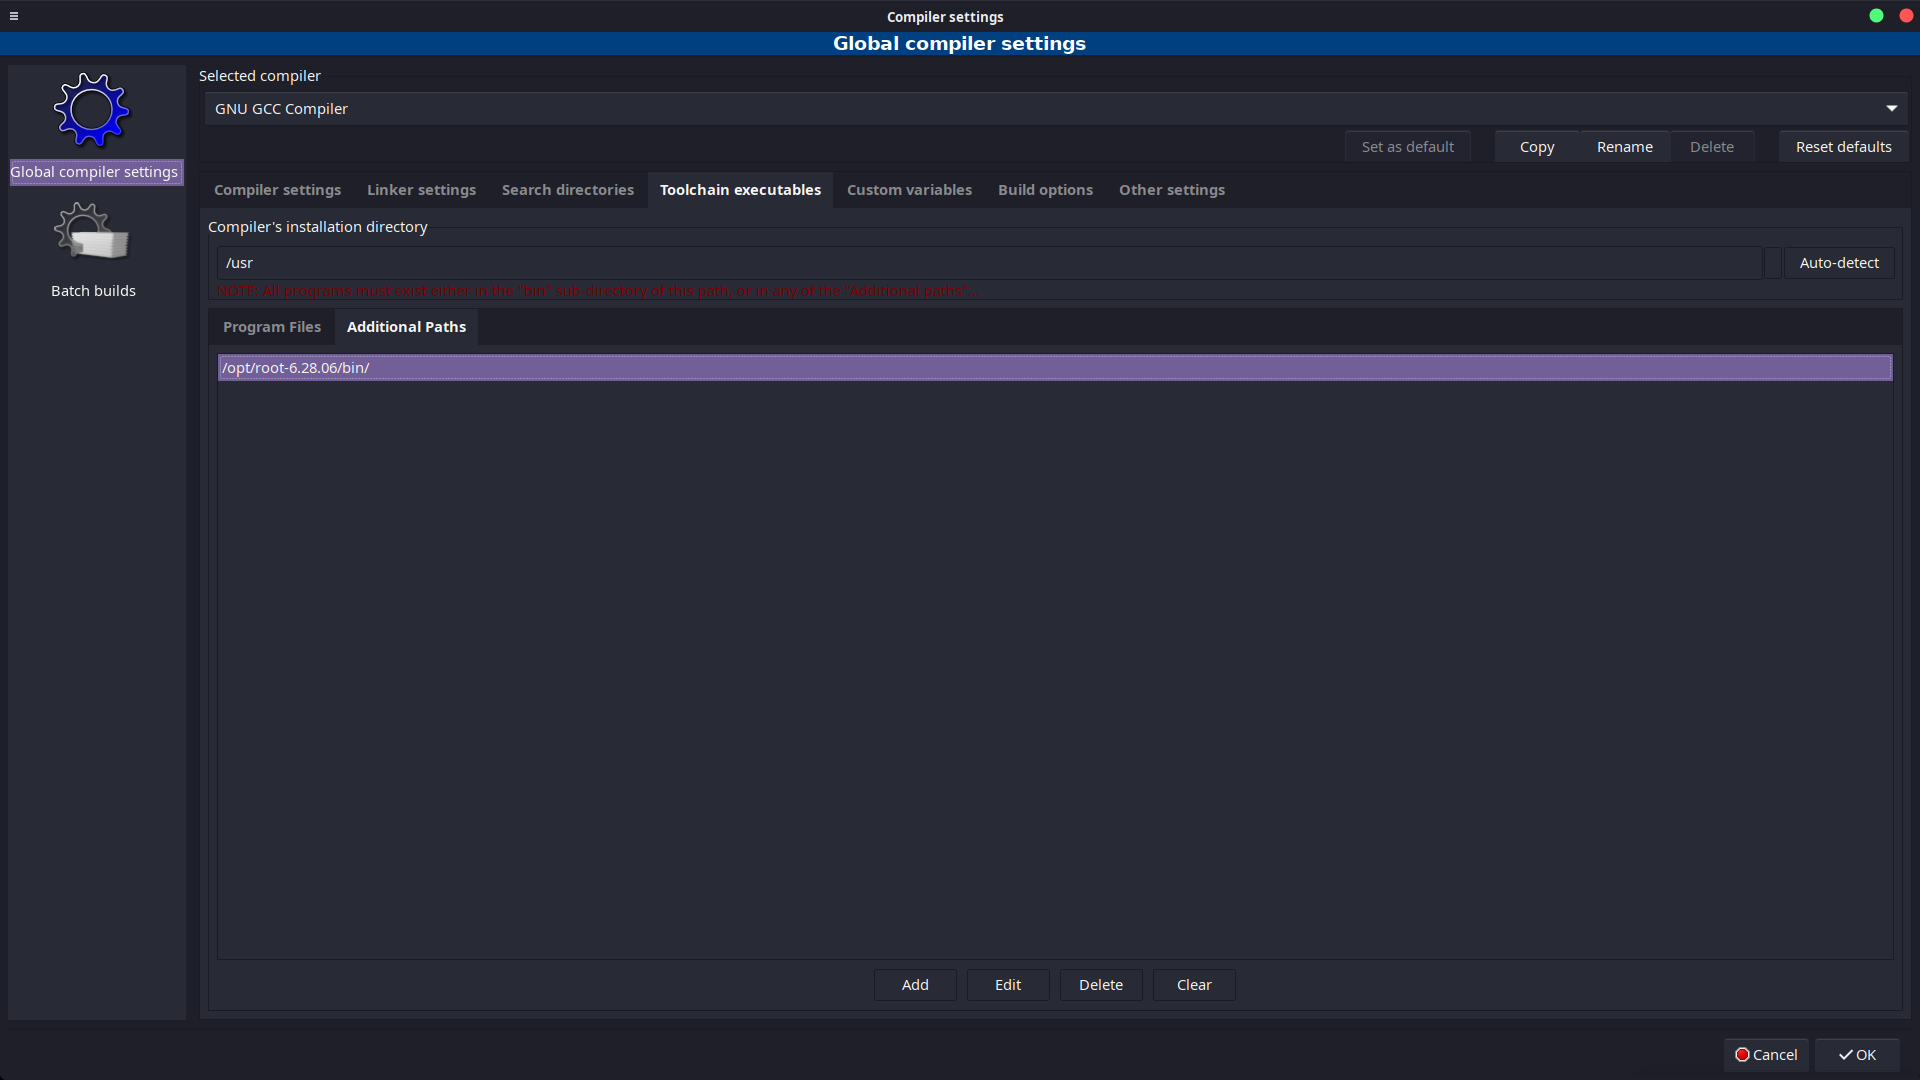
Settings > Compiler > Toolchain Executables > Additional Pathshidden away deep, and usingAddto add, in our case,/opt/root-6.28.06/bin/which was the installation directory, containing root-config, rootcint, thisroot.sh etc. Following all this, running “Make” will do all it has to do, following the exact processmake allwould’ve done for us in bash, and bringing up the executable in anxtermwindow when we hit ‘run’.
- If your Makefile has all the
- Parting comment: There is something to be said about the convenience of the IDE telling you all about function syntaxes as you type them, and the option of doing debug-testing while being a little spoiled. Using a custom
Makefilealso gives us full control over how we compile the project, which was what originally dragged me away from half-cooked IDEs. - Parting comment #2:
Settings > Compiler.. > Global Compiler Settings > Search Directories > Addcan be used to include a pathname to ROOT’sincludedirectory, such as/opt/root-6.28.06/include/, which will then turn-on the extremely helpful ‘code-completion’ toolkit that auto-suggests function templates and similar details as you type. ROOT’s default online documentation landscape can be a little cumbersome to explore, this might help save some consternation when you’re trying to remember the exact order of an obscure constructor or method.
Tested using:
- GNU Make 4.3
- gcc 11.4
- Code::Blocks 20.03
- CERN ROOT v6.28.03
- All running in Ubuntu 22.04 with a Linux-6.2 Kernel